Christmas Cupcake Toppers {Using Nutter Butters}

Festive Christmas cupcake toppers are fun and easy to create using Nutter Butter cookies!
Christmas Cupcake Toppers Using Nutter Butters (Snowman, Reindeer, and Santa) | {Five Heart Home}I find it almost impossible to believe that we’re less than a week out from Christmas. My kids are wrapping up school this week, and (in between getting all of the presents wrapped) I’m looking forward to some enjoyable, leisurely days over the next couple of weeks getting in some of the holiday fun that we haven’t had time for up to this point: driving around to look at Christmas lights, watching some of our favorite Christmas movies, and baking up more yummy holiday treats together.
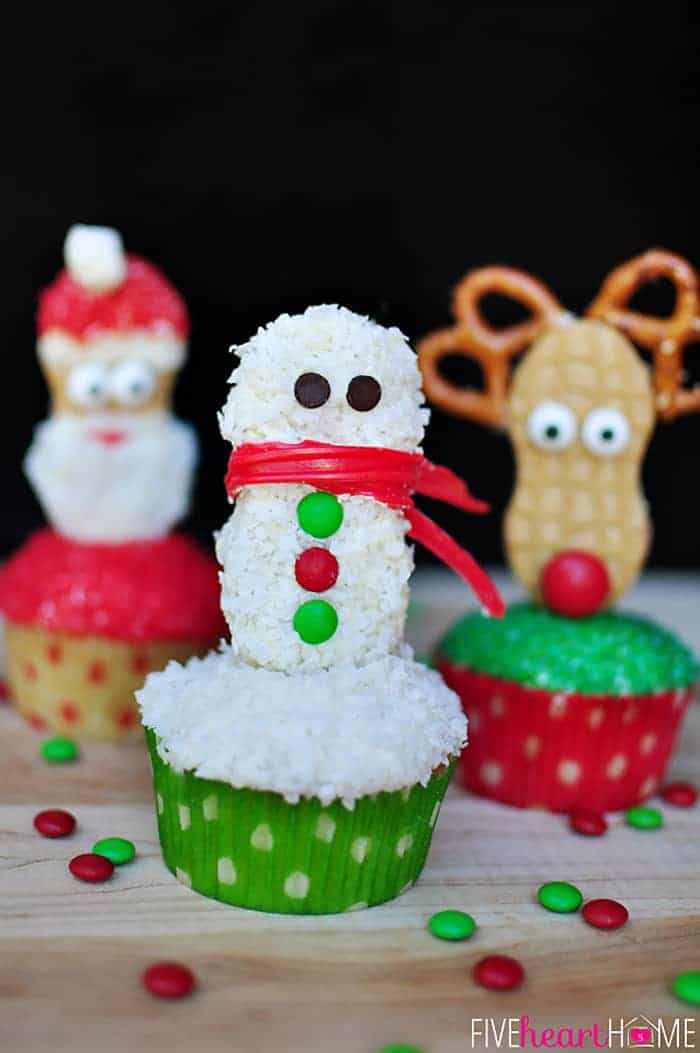
Christmas Cupcake Toppers Using Nutter Butters (Snowman, Reindeer, and Santa) | {Five Heart Home}The good news is that whipping up cute Christmas treats doesn’t mean you have to break out the fondant or toil over perfectly iced sugar cookies. Baking with kids should be fun, and these Christmas-inspired cupcake toppers are just that: fun…and easy! My boys were thrilled to help make (and eat!) these cuties and even the 15-month-old was beyond excited about them.
I’m sure you’ve seen creatively transformed Nutter Butters all over Pinterest, so I’m not sure to whom I should give credit for having inspired these ideas. I know they’ve been done before in some way, shape, or form…but these are my takes on them. So bake up a batch of your favorite cupcakes (I used this recipe — the best-ever quick, from-scratch vanilla cupcakes!) and let’s get started, shall we?
(No printable recipe today, folks…I think the photos plus some quick descriptions are all that you’ll need!)
THE SNOWMAN:
Christmas Cupcake Toppers Using Nutter Butters (Snowman, Reindeer, and Santa) | {Five Heart Home}
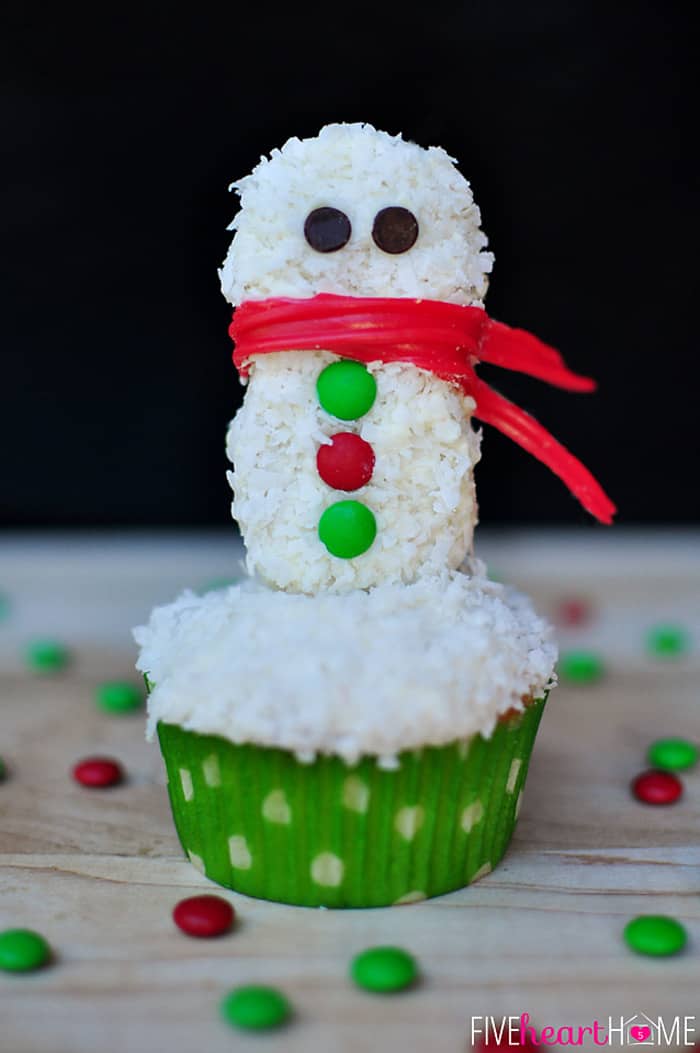
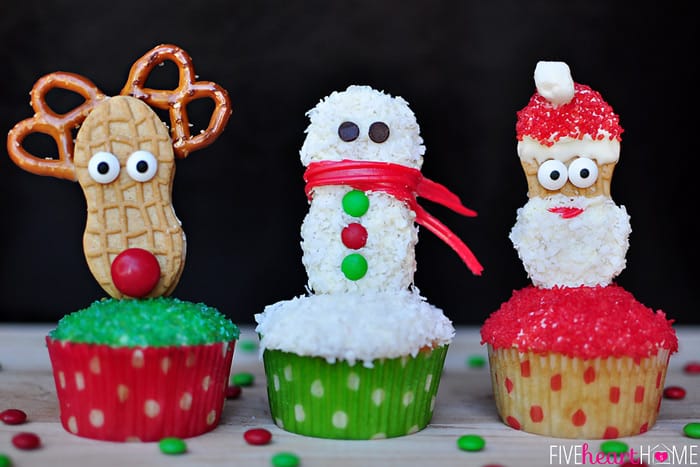
I started out by dipping this guy in some melted white almond bark-type candy coating. Then I pressed him into sweetened, shredded coconut that I’d first given a whir in the food processor. The food processor step probably isn’t necessary, but I wanted my coconut to have a finer texture. I used additional almond bark to adhere some mini chocolate chip eyes, mini M&M buttons, and a scarf cut out of a Twizzler. Then I frosted my cupcake, dipped the frosting in coconut, stuck a toothpick in the bottom of my snowman, and centered him on the top of the cupcake. Cute, isn’t he???
THE REINDEER:
Christmas Cupcake Toppers Using Nutter Butters (Snowman, Reindeer, and Santa) | {Five Heart Home}
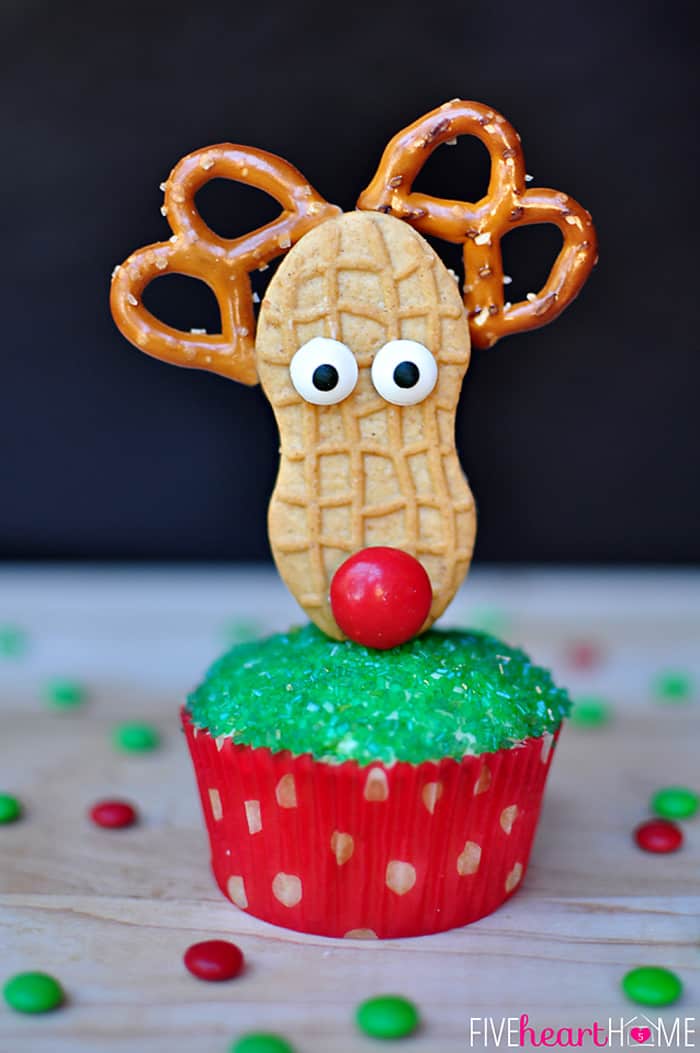
For this guy, I opened up the Nutter Butter and used some melted almond bark to adhere the pretzel twist antlers in place and then to hold the two sides of the cookie back together. I used additional almond bark to affix some candy eyes and a red M&M nose. Feel free to use whatever red candy you happen to have on hand, and halved mini marshmallows with mini chocolate chip centers could also be used as eyes. A toothpick stuck in the bottom, and he was ready to adorn a lucky cupcake!
THE SANTA:
Christmas Cupcake Toppers Using Nutter Butters (Snowman, Reindeer, and Santa) | {Five Heart Home}
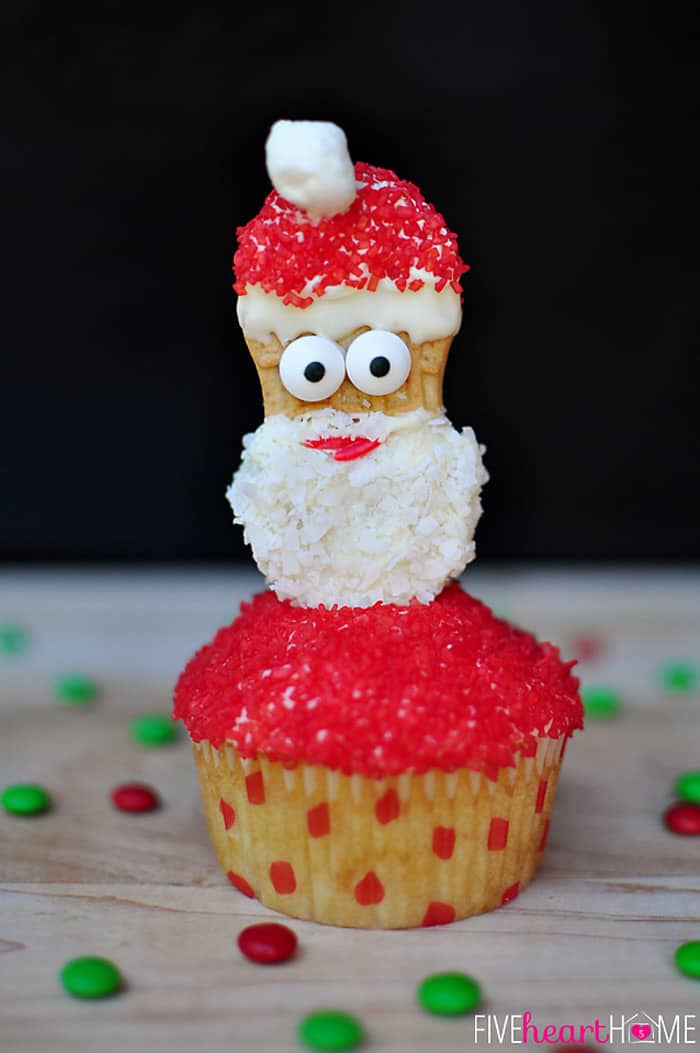
I dipped the top portion of the Nutter Butter in melted almond bark and then in red sparkling sugar, leaving a rim of white for the edge of the hat. I dipped the bottom part of the cookie in almond bark as well, but that part I covered in more coconut to give texture to Jolly Ol’ St. Nick’s beard. Then I used a bit more almond bark to adhere candy eyes, a teeny, tiny Twizzler mouth, and a mini marshmallow pom pom on the top of his red hat.
And if his eyes look somewhat large in proportion to the rest of his face, that’s because he sees you when you’re sleeping.
Christmas Cupcake Toppers Using Nutter Butters (Snowman, Reindeer, and Santa) | {Five Heart Home}It goes without saying that you can customize these bad boys to your heart’s content depending on your own creativity and what type of candy decorations you have on hand. The main thing to remember is have fun! Make one variety or make them all. And if you think of any other Christmas-y characters to make out of a Nutter Butter, please share it with the rest of us in the comments! I’ve made Nutter Butter flip flops before, but those didn’t seem very fitting for December… 😉

This Couple Takes Their Christmas Portrait for 40 Years From 1900 – 1942

Just like many families today, Richard and Anna Wagner took annual holiday portraits. Taken every Christmas Eve, from the year they were married in 1900 until just a year before Richard’s death in 1943, the photos were sent out as Christmas cards to friends and family.
For us modern viewers, it’s fascinating to see not only the couple age, but also the small addition of household items that were added as time passed and technology improved. Check out that vacuum cleaner in 1927!
Here are eight of the photos from the series, offering us a quick look through those bygone years.

1900: The first photo shows the young and newly wed couple. Richard holds a silver topped cane and Anna lifts up her car Meitz to show him the many gifts they’ve received. The house has little decoration but looks comfortable.
Anna-and-Richard-Wagner-(1)

1908
Anna-and-Richard-Wagner-(2)

1912: Pictured here with some of their things, somehow showing their improving financial status. Richard now sits at the desk as Anna tidies around him.
Anna-and-Richard-Wagner-(3)

1915: A map is included in this photo show the advances of the German Troops in the Great War.
Anna-and-Richard-Wagner-(4)

1917: The fortunes of the War have been reversed, and Anna and Richard are in their overcoats, signaling the lack of winter fuel.
Anna-and-Richard-Wagner-(5)

1927: Richard begins is now with glasses and his hair is showing signs of grey. Anna’s got a new vacuum cleaner as her Christmas present – electricity has been installed.
Anna-and-Richard-Wagner-(6)

1935: A frugal year. Richard begins to look older.
Anna-and-Richard-Wagner-(7)

1942: By 1942, both have gone completely grey and are again wearing their winter coats.
Anna-and-Richard-Wagner-(8)
The final picture of this series shows Anna all alone – no tree, no presents. Richard had died in August of that year. And even though Anna lived for another five years, the series stops here.

MASON JAR LID SNOW GLOBE

Happy Holidays! We have something so adorable to share with you today! Who loves snow globes? (Raises hand). Who loves mason jars? (Raises other hand). This easy DIY Christmas craft idea is just for people like us! Today I’ll show you how to make a cute mason jar lid snow globe using just a few simple supplies. You know how we do things around here at Smart School House…. crafts need to be fun for everyone and recipes need to be quick and easy! Are you ready to see the secret for how to make a snow globe out of a mason jar lid? It’s so much easier than you think….
How to make a Mason Jar Lid Snow Globe for Christmas using a clear plastic ornament. ADORABLE! Easy for everybody to do! DIY Christmas gift in a jar idea.
For this craft, you will need the following supplies:
  • Mason jar with a lid. Find them at a grocery store, craft store, or here
  • This is the large jar I used.
  • Miniature Christmas tree ornaments. Find them at the craft store or here
  • 1 bag of fake snow. Found at a craft store or here
  • String, ribbon, or twine (to wrap around the lid)
  • Glue gun
  • White paper
  • Scissors
  • Clear plastic ornaments that like these:
How to make a Mason Jar Lid Snow Globe for Christmas using a clear plastic ornament. ADORABLE! Easy for everybody to do! DIY Christmas gift in a jar idea.
Watch how fun and easy it is to make a snow globe out of a mason jar lid:
I went to Michaels and found 2 different sized clear plastic ornaments. The “small” ones fit on top of a regular mason jar as well as the small mason jar. The large one fit on the big jar! If you’re unsure , grab one of these plastic ornaments at Michael’s and head to where they have the mason jars to find ones that “fits” closely on a lid. In the end, they will look cute no matter what on top of a mason jar!
How to make a Mason Jar Lid Snow Globe for Christmas using a clear plastic ornament. ADORABLE! Easy for everybody to do! DIY Christmas gift in a jar idea.
You will also need something to fill the jar(s) with! I used mini candy canes, hot chocolate with marshmallows, and the big jar has pretend snowballs and these battery powered twinkle lights inside (also known as fairy lights). It looks SO PRETTY at night when the lights are glowing in the jar. It’s my favorite!
How to make a Mason Jar Lid Snow Globe for Christmas using a clear plastic ornament. ADORABLE! Easy for everybody to do! DIY Christmas gift in a jar idea.
Directions:
  1. Take apart the mason jar lid and trace inner circle part of the lid on white paper. 
  2. Cut the circle out and glue the paper circle to the inside of the lid
  3. Hot glue the lid to the rim (as seen in the video)
  4. Cut the ornament string off of the top of the miniature Christmas tree ornaments. 
  5. Create a snow globe scene! Hot glue different things on top of the white paper. 
  6. Add some fake snow on top.
  7. Dust off any extra snow on the very outside of the mason jar lid.
  8. Open up a clear plastic ornament and glue so it is in 2 pieces. Glue around the 1 of the edges or glue the edge of the mason jar lid (either works!)
  9. Place it on top of the mason jar! There is a small circle on the ornaments which is made to put string in and hang on a tree. Place that circle part in the back of the snow globe when gluing so it is hidden. 
  10. Add whatever you want on the inside of your mason jar and tie a little string, ribbon, or twine around the lid to finish it off. 
How to make a Mason Jar Lid Snow Globe for Christmas using a clear plastic ornament. ADORABLE! Easy for everybody to do! DIY Christmas gift in a jar idea.
Aren’t these the cutest DIY snow globes you’ve ever seen? They’re so cute that you could actually give them as gifts! We use them as decoration on our mantle. My kids love to sneak a candy cane here and there:)
How to make a Mason Jar Lid Snow Globe for Christmas using a clear plastic ornament. ADORABLE! Easy for everybody to do! DIY Christmas gift in a jar idea.
What kind of holiday scene will you create in your mason jar lid snow globe? These are so simple and beautiful that you can’t go wrong with making any kind of snow globe you can dream up!
How to make a Mason Jar Lid Snow Globe for Christmas using a clear plastic ornament. ADORABLE! Easy for everybody to do! DIY Christmas gift in a jar idea.

CHRISTMAS GRINCH JUICE RECIPE

This week I made my Sweet’N Low Grinch Juice for the upcoming holidays as part of a sponsored post for Socialstars #SweetNLowStars
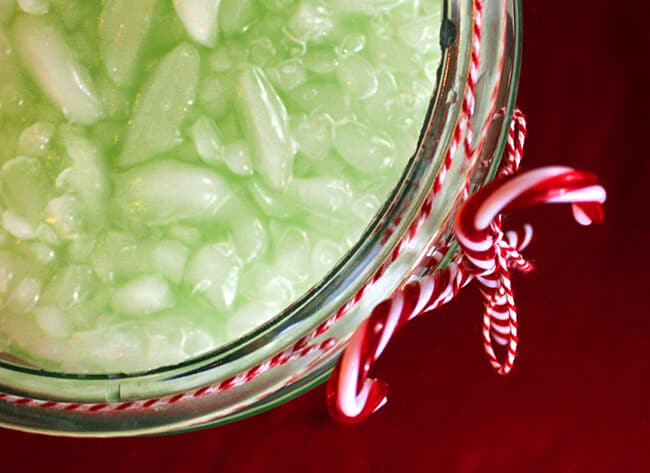
The Grinch Punch recipeChristmas time is here! and it is time for holiday parties, get togethers, and gatherings with family and friends. you may need a fun and quick recipe for one of your Christmas events, so i am showing you this Grinch Juice recipe inspired by one of my all-time favorite Christmas stories, How The Grinch Stole Christmas. so i love to make this green punch and call it Grinch Juice! by dressing up the punch bowl and adding a few fun garnishes, your guest will definitely not be Grinches this year.
Grinch Punch
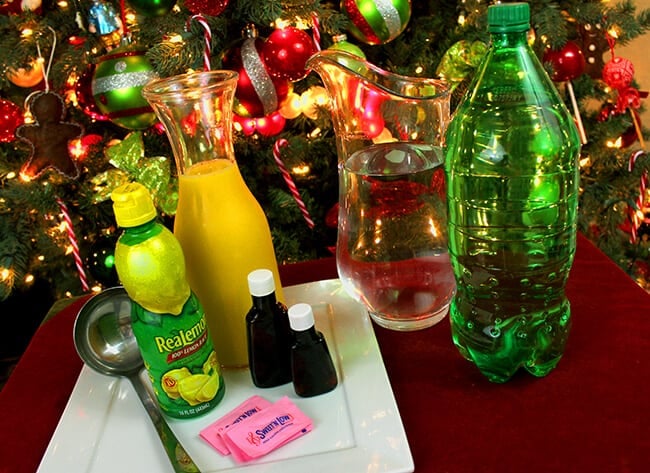
to make this Grinch Juice, you will need blue food coloring, orange juice, lemon juice, Sweet’N Low, water, vanilla extract, almond extract and lemon-lime soda.
grinch juice ingredients
in a punch bowl or pitcher (i suggest clear glass so you can see the green) combine two drops of blue food coloring, orange juice, lemon juice, Sweet’N Low, and water. stir until combined. next add the vanilla and almond extracts. now you can either chill it overnight in the fridge, or serve immediately.
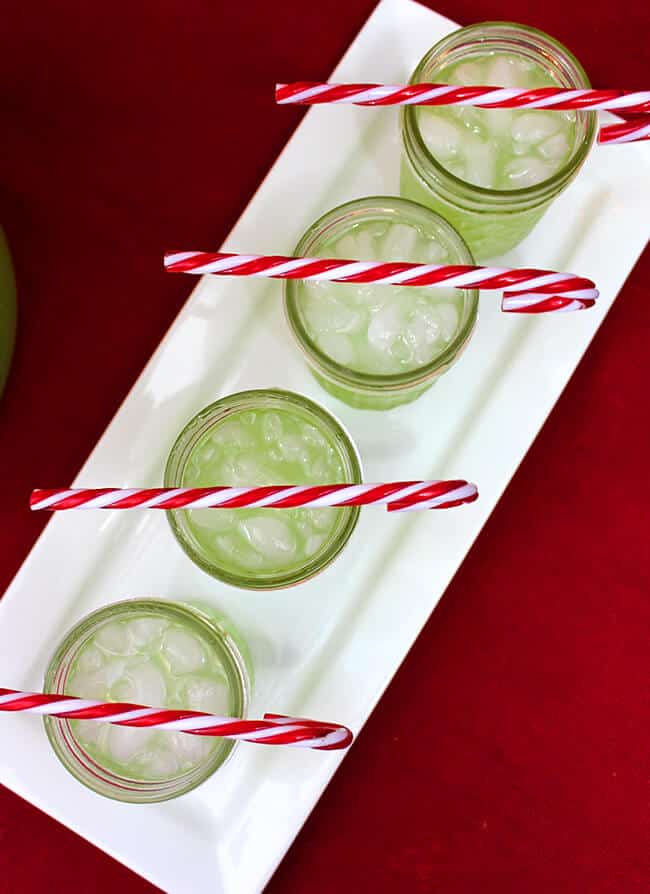
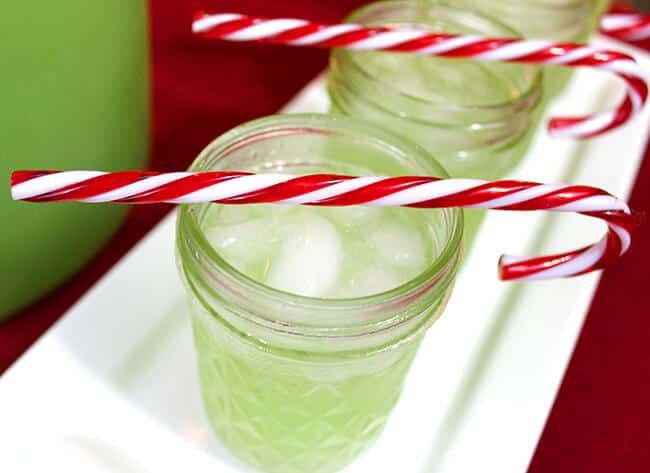
finally, when you are ready to serve, you can fill your glasses with ice and then pour the juice over the ice. i like to garnish with a candy cane or maraschino cherry. you can also just let your guests serve themselves.
Christmas grinch punch recipe
Grinch Juice idea
grinch punch recipe
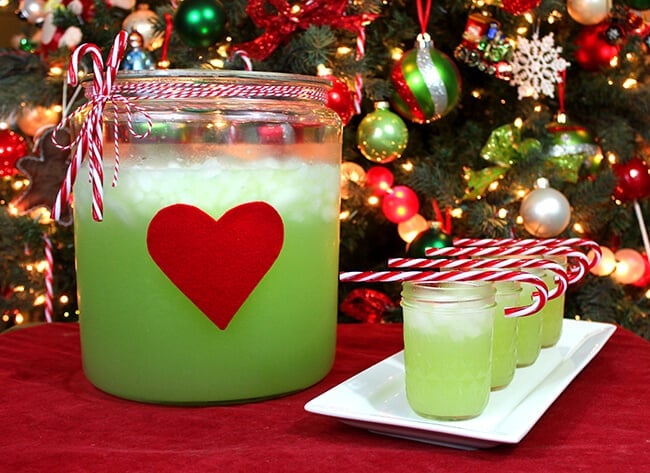
to make my Grinch Juice extra festive, i like to use a tall, clear glass punch bowl or clear glass pitcher. then i cut out a heart out of felt or cardstock and affix it on the front of the bowl or pitcher to represent the Grinch’s heart that finally grew 3 sizes the year that he brought Christmas back to the Whos. you can also place How The Grinch Stole Christmas story book next to the juice…or make a fun sign.
grinch juice punch
this Grinch Juice is a great compliment to any Christmas Party. kids and adults will enjoy it’s fun theme. the lemon-lime flavor is a light and refreshing compliment to holiday appetizer spread. and pssst, using the Sweet ‘N Low cuts down on the extra calories of added sugar, you are saving 2 cups of sugar from this drink….plus, i can’t tell the difference in this particular drink. add more or less according to your taste.
ingredients
2 drops blue food coloring
2 cups orange juice
1-1/4 cup lemon juice
4 packets Sweet’N Low
6 cups water
2 teaspoon vanilla extract
1-1/2 teaspoon almond extract
1 liter lemon-lime soda
Garnish – candy canes, maraschino cherries
directions
in a punch bowl, mix together orange juice, lemon juice, Sweet’N Low, water and food coloring. stir until combined. next add vanilla extract and almond extract. chill overnight, or serve immediately following the next directions.
When ready to serve:
add add lemon-lime soda and ice to the juice. taste, and adjust any of the flavors to your liking. you can garnish each cup with a candy cane or a maraschino cherry.
tip: to make your drink look extra Grinchy, tape or glue a heart to the outside of the container.
how to make Grinch Juice

HOW TO MAKE RUSTIC TWIG CHRISTMAS ORNAMENTS

Bring a touch of nature indoors this year as you decorate your tree – learn how to make rustic twig Christmas ornaments! They’re simple, inexpensive and look beautiful!
Bring a touch of nature indoors this year as you decorate your tree – learn how to make rustic twig Christmas ornaments! They're simple, inexpensive and look beautiful!
This year we put together an Outdoor Adventure themed Christmas tree and we love it so much! From the DIY Photo keepsake ornaments, to the buffalo check accents, to the faux wood-burned ornaments – this tree has been a handmade labour of love.
We took our inspiration for the tree from nature and decorated it in a way that emphasized our families love for spending time outdoors together. Each ornament is a nod to our love of National Parks, hiking and exploring outside!
Bring a touch of nature indoors this year as you decorate your tree – learn how to make rustic twig Christmas ornaments! They're simple, inexpensive and look beautiful!
Today I wanted to share a final how-to for some of my favorite ornaments on the tree. These rustic twig ornaments were a lot of fun to make. When creating an outdoor themed Christmas tree, what else can you do but bring some elements from nature indoors! Right?
These ornaments add just the right touch to our outdoorsy tree and below you’ll find instructions and a short video showing you exactly how I made them.

Bring a touch of nature indoors this year as you decorate your tree – learn how to make rustic twig Christmas ornaments! They're simple, inexpensive and look beautiful!
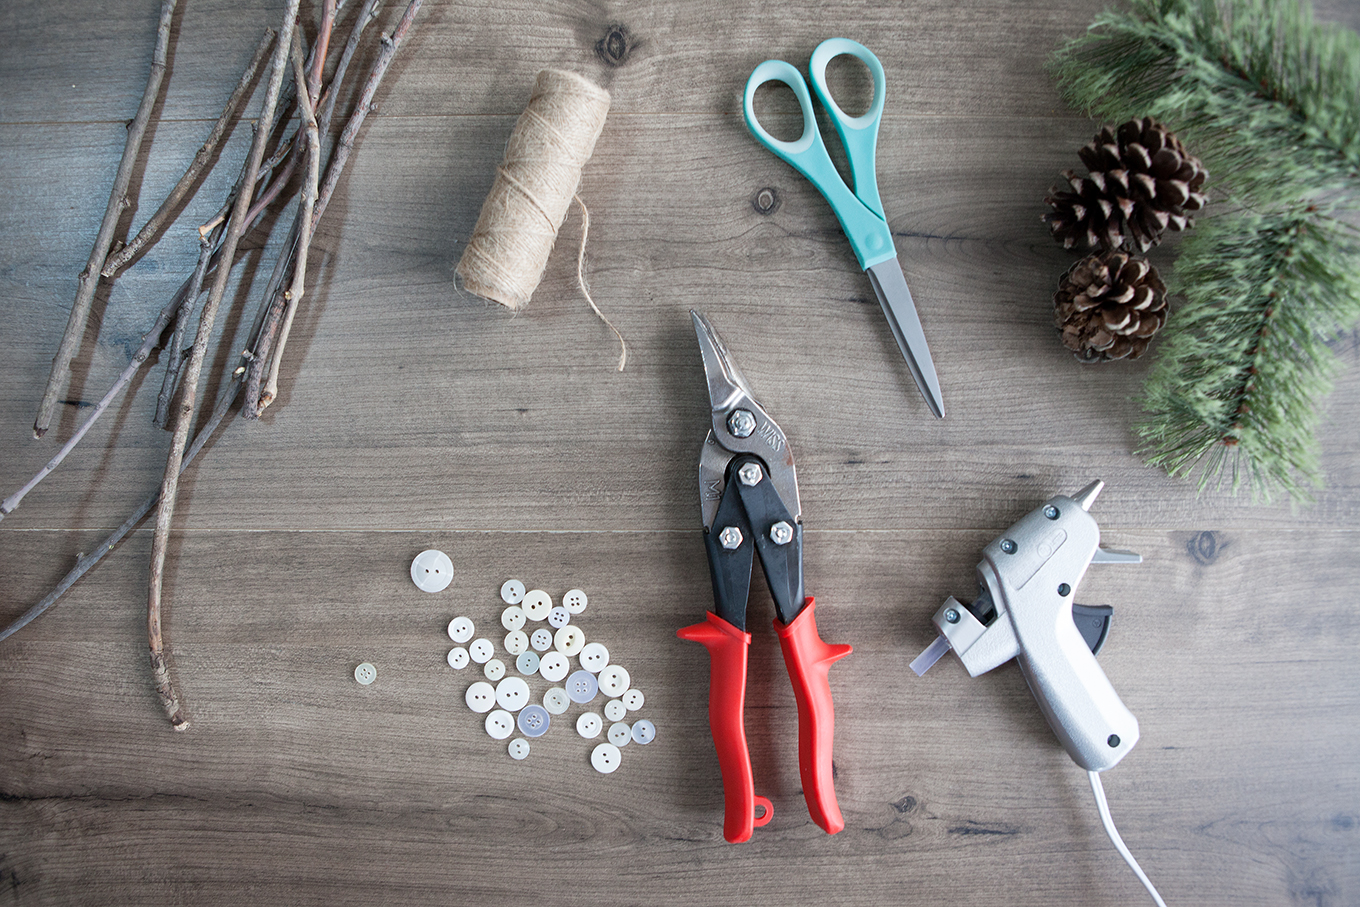
*All supplies for this project can be purchased at your local Michaels Craft Store.
Supplies
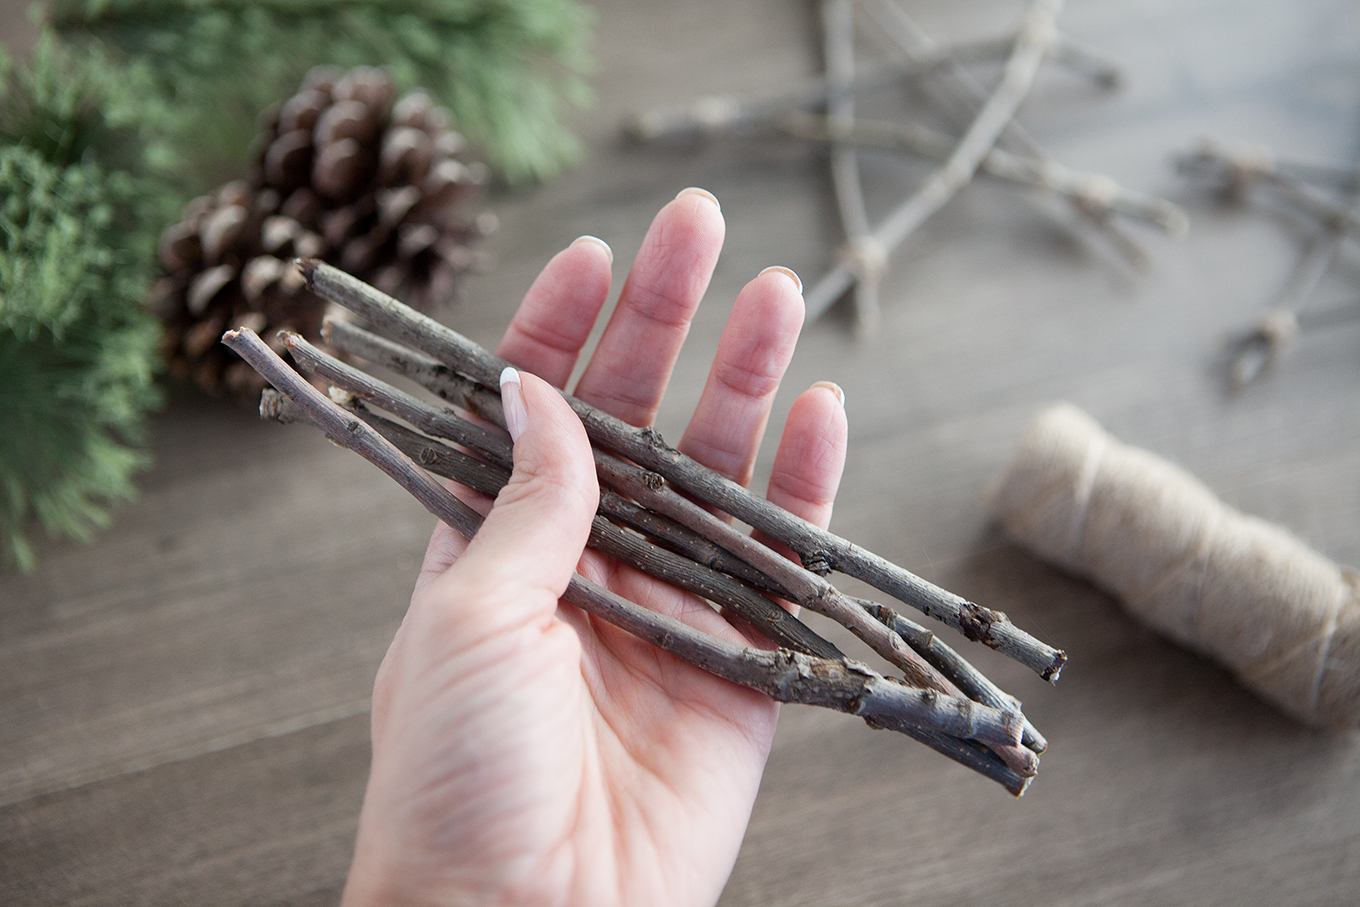
Thin branches or twigs
Garden shears
Glue gun and glue sticks
Twine
Sharpie
Buttons
Sprigs of faux pine / berries
Bring a touch of nature indoors this year as you decorate your tree – learn how to make rustic twig Christmas ornaments! They're simple, inexpensive and look beautiful!
Instructions
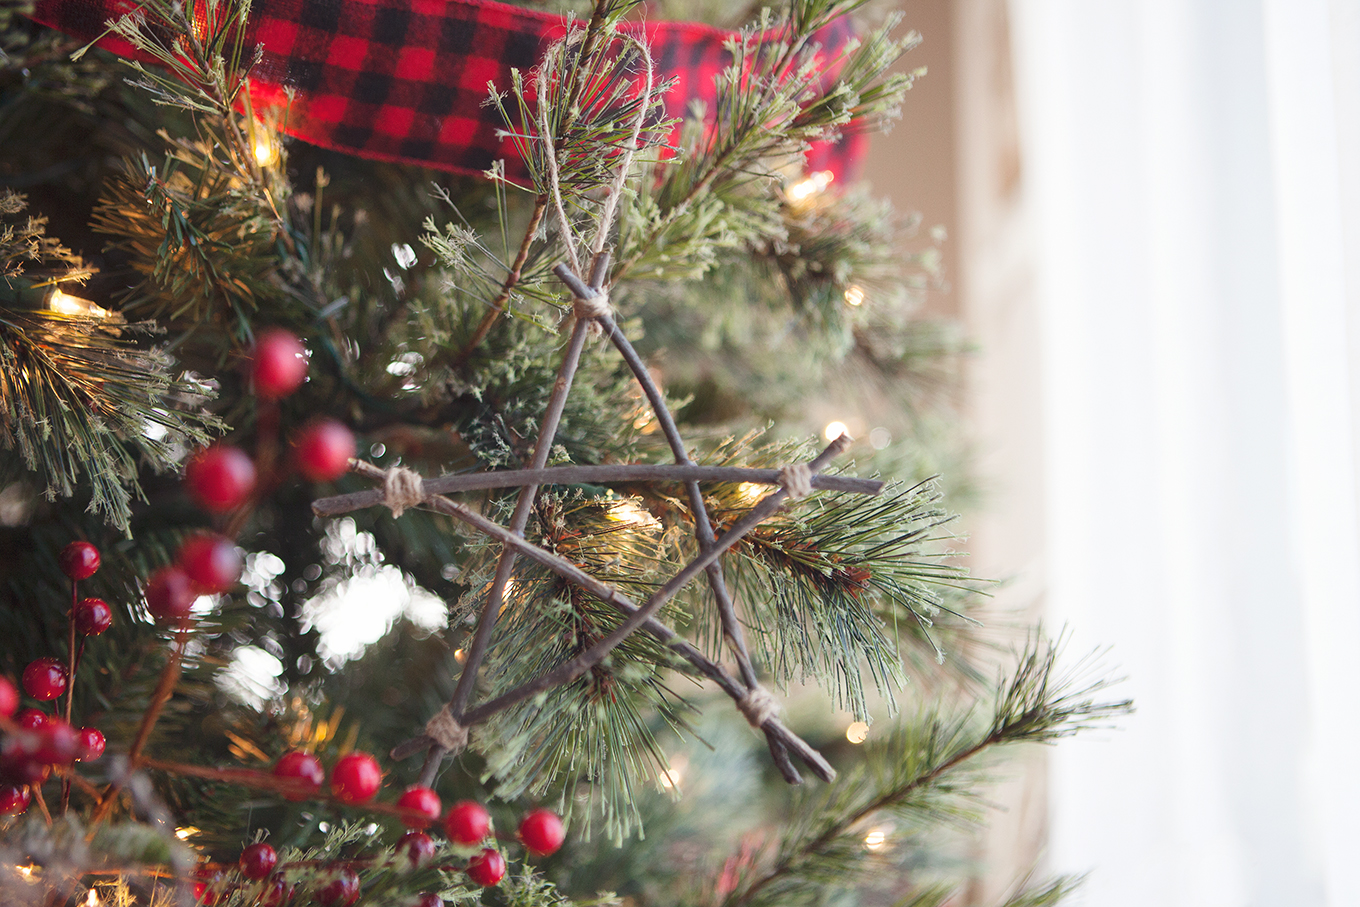
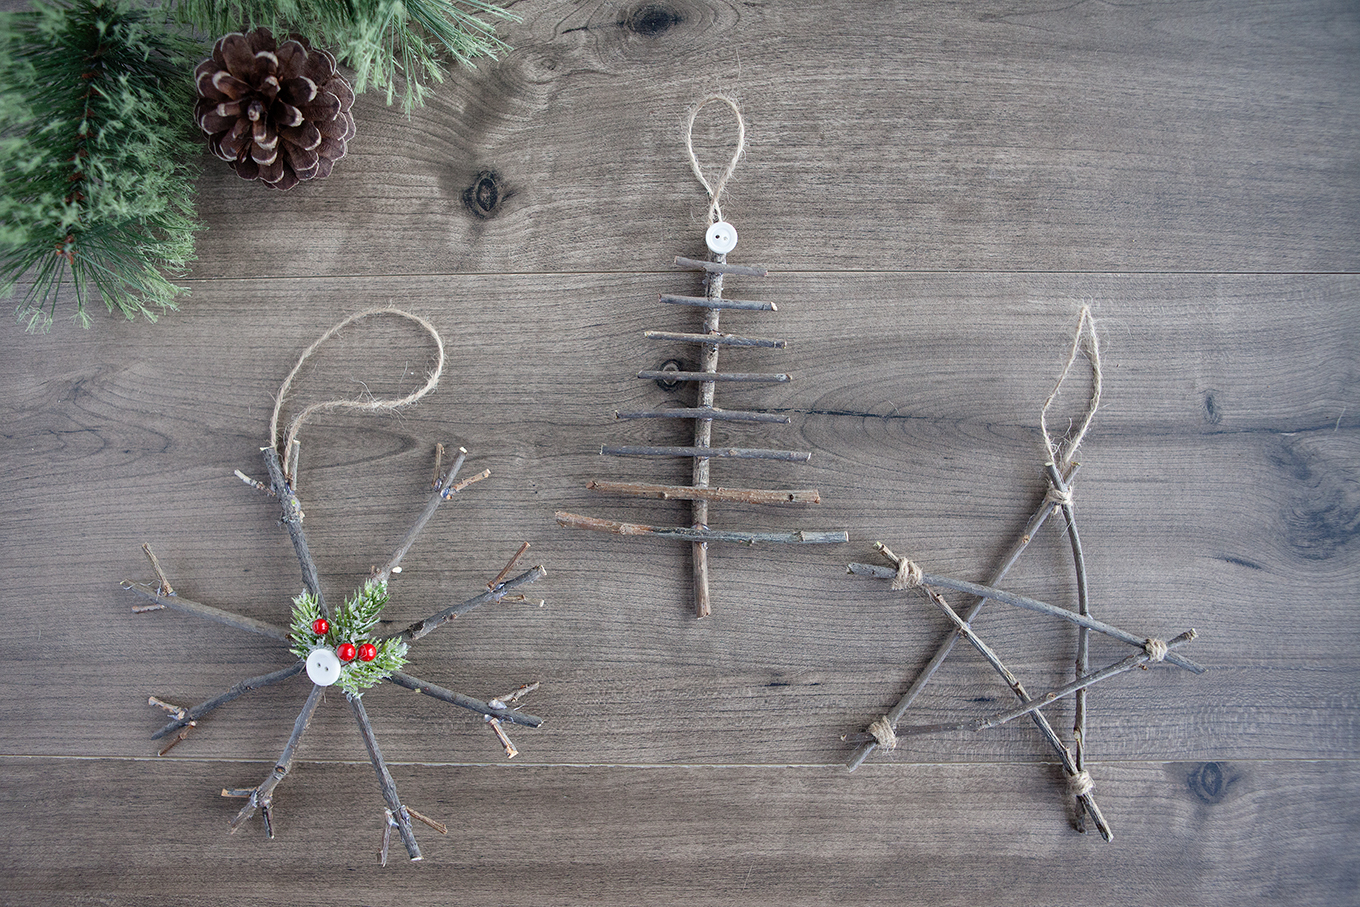
To make the star ornament trim 5 twigs to equal length with your garden shears.
Bring a touch of nature indoors this year as you decorate your tree – learn how to make rustic twig Christmas ornaments! They're simple, inexpensive and look beautiful!
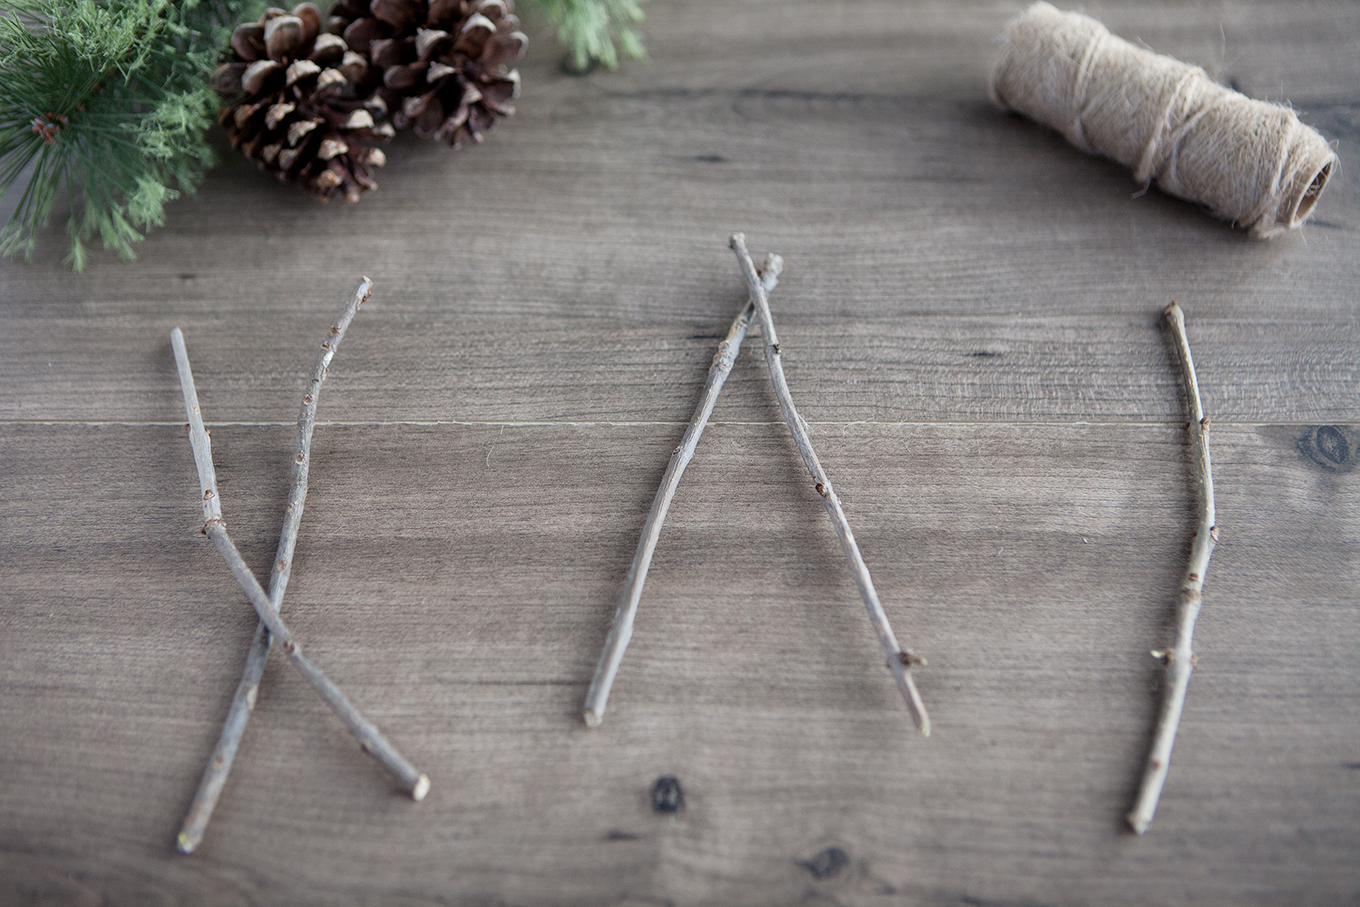
Begin with two twigs, over lap them in an upside down “V” shape. Using hot glue attach the two twigs at the top as pictured.
Bring a touch of nature indoors this year as you decorate your tree – learn how to make rustic twig Christmas ornaments! They're simple, inexpensive and look beautiful!
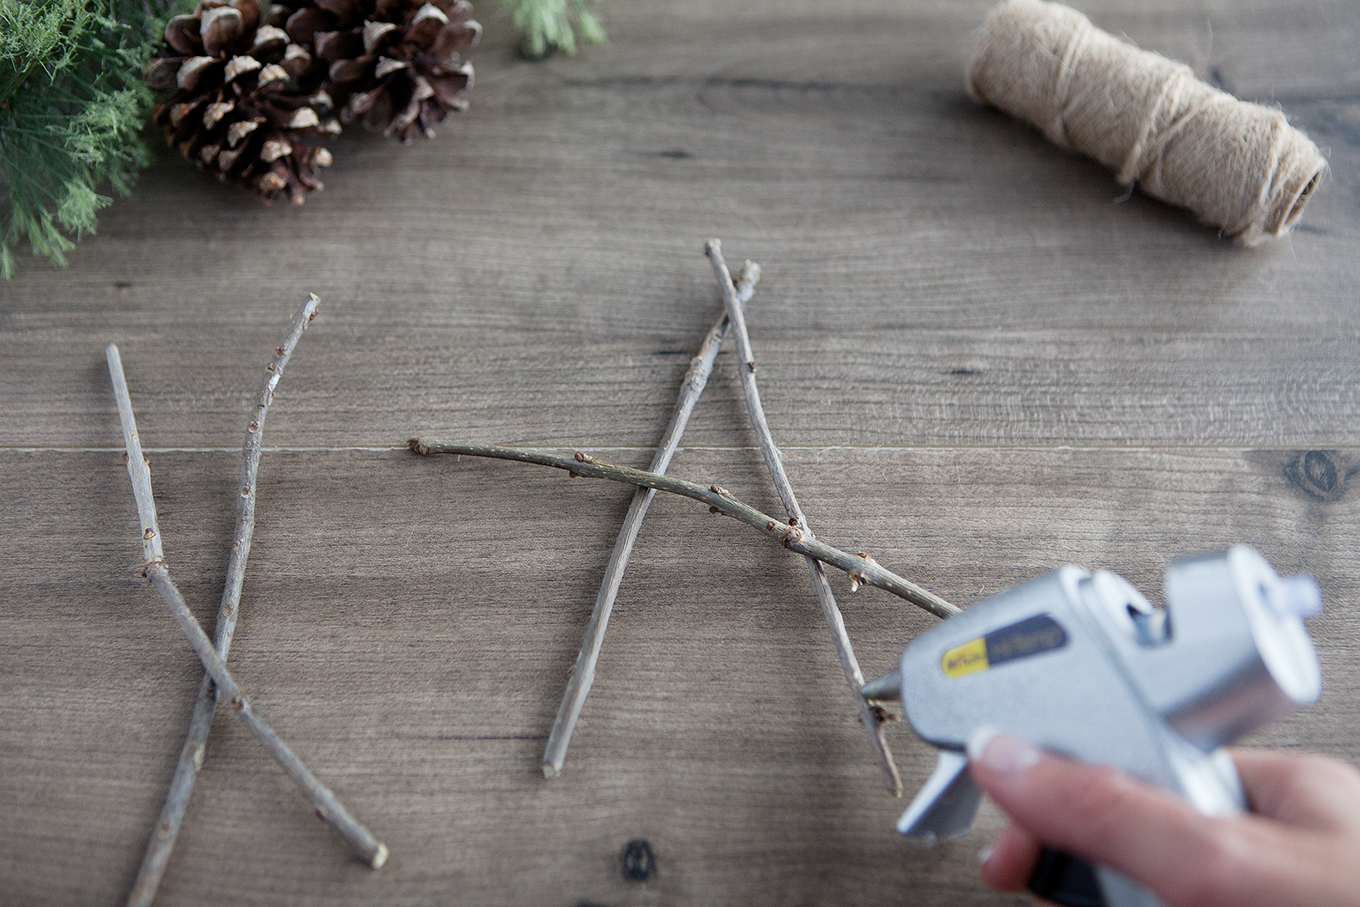
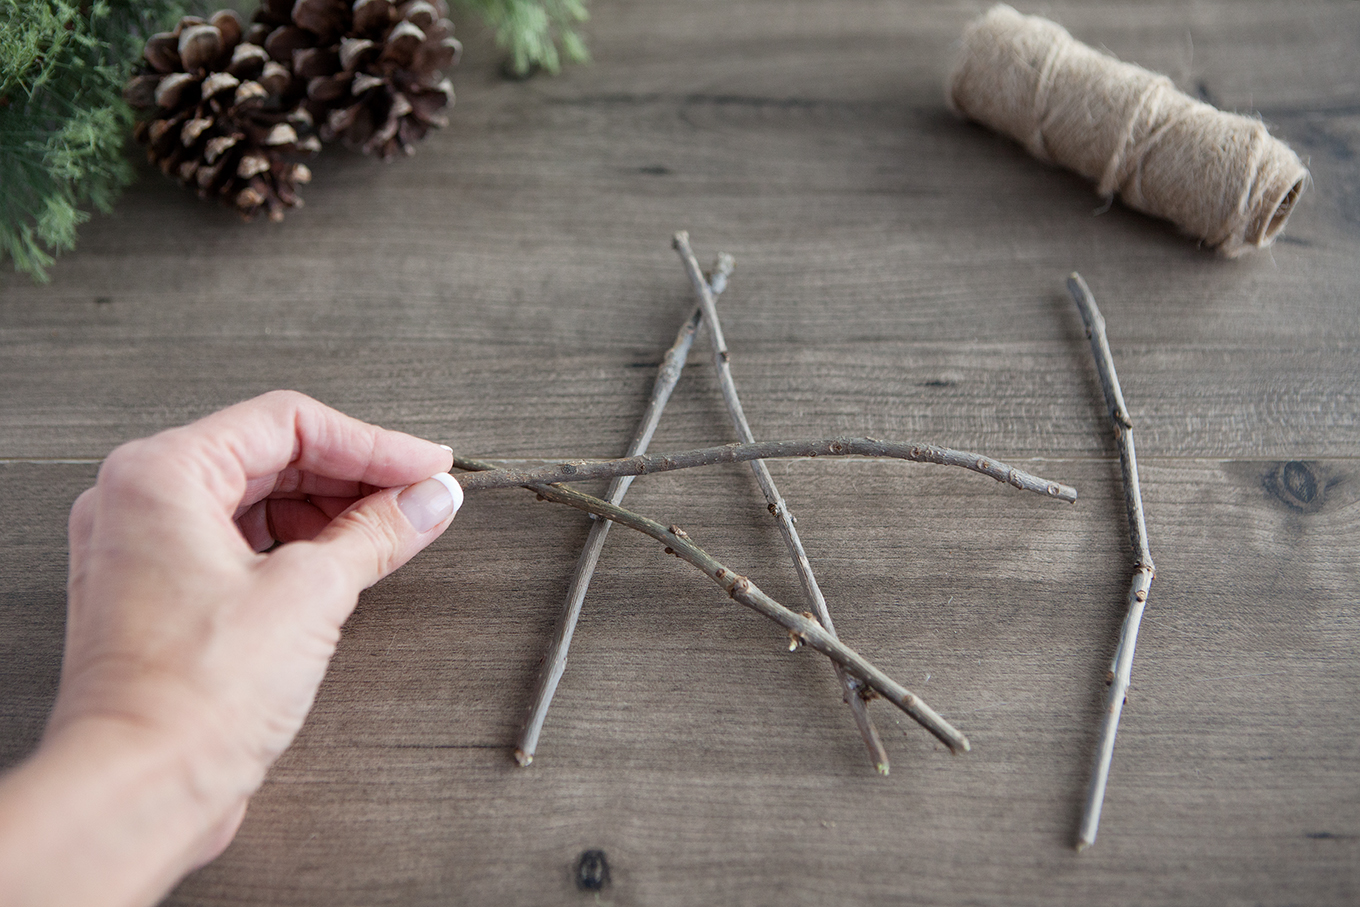
Get another twig and attach on top of the first two twigs going across diagonally.
Bring a touch of nature indoors this year as you decorate your tree – learn how to make rustic twig Christmas ornaments! They're simple, inexpensive and look beautiful!
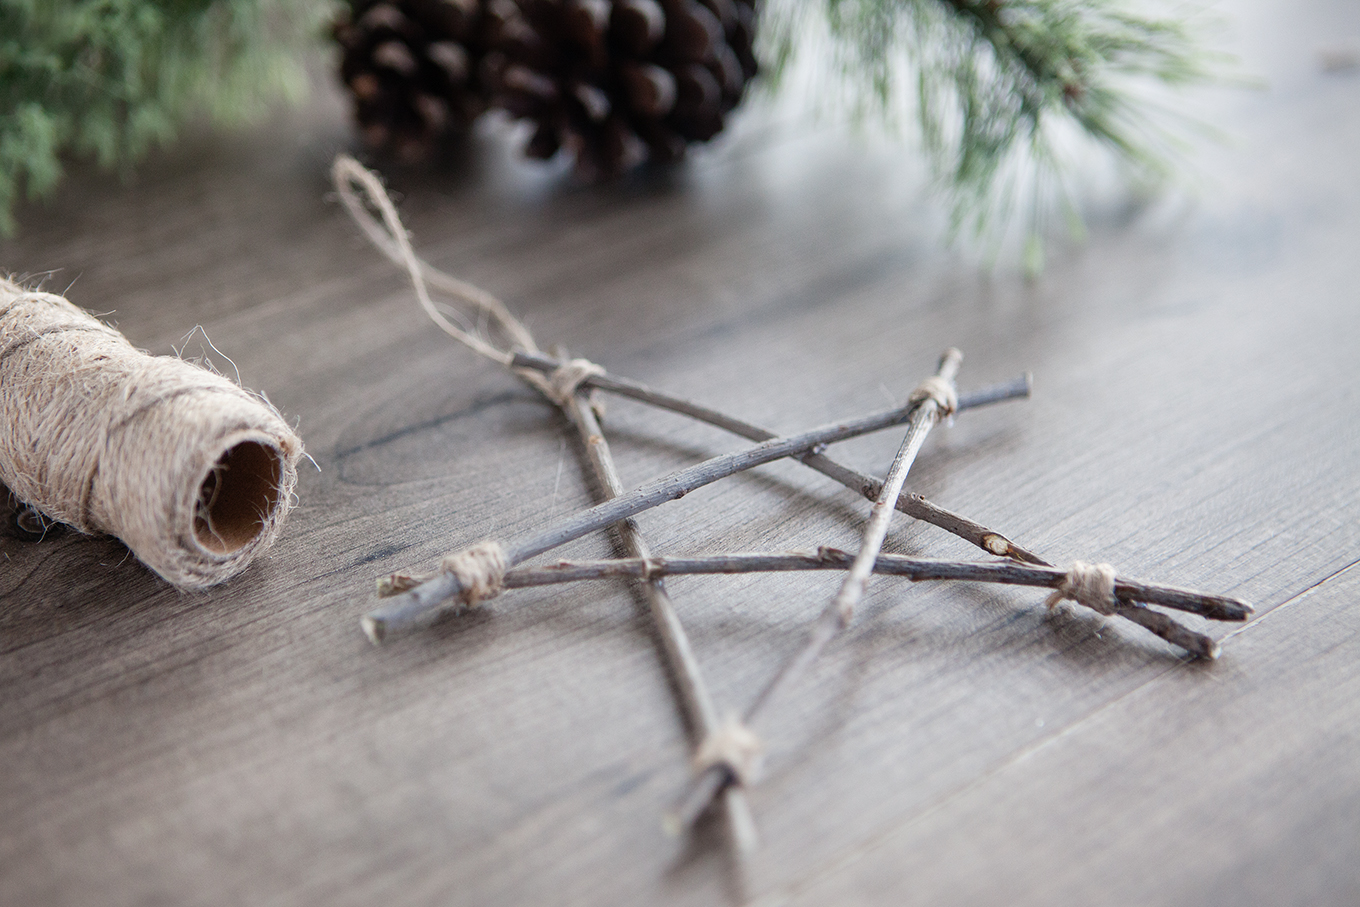
Continue adding your twigs until the star is complete.
Bring a touch of nature indoors this year as you decorate your tree – learn how to make rustic twig Christmas ornaments! They're simple, inexpensive and look beautiful!
To reinforce the point of each star, take a short length of twine. Hot glue it to the back side of the ornament at one of the points. Wrap around 3-4 times then hot glue the end of the twine to the back of the ornament. Trim any excess.
Bring a touch of nature indoors this year as you decorate your tree – learn how to make rustic twig Christmas ornaments! They're simple, inexpensive and look beautiful!
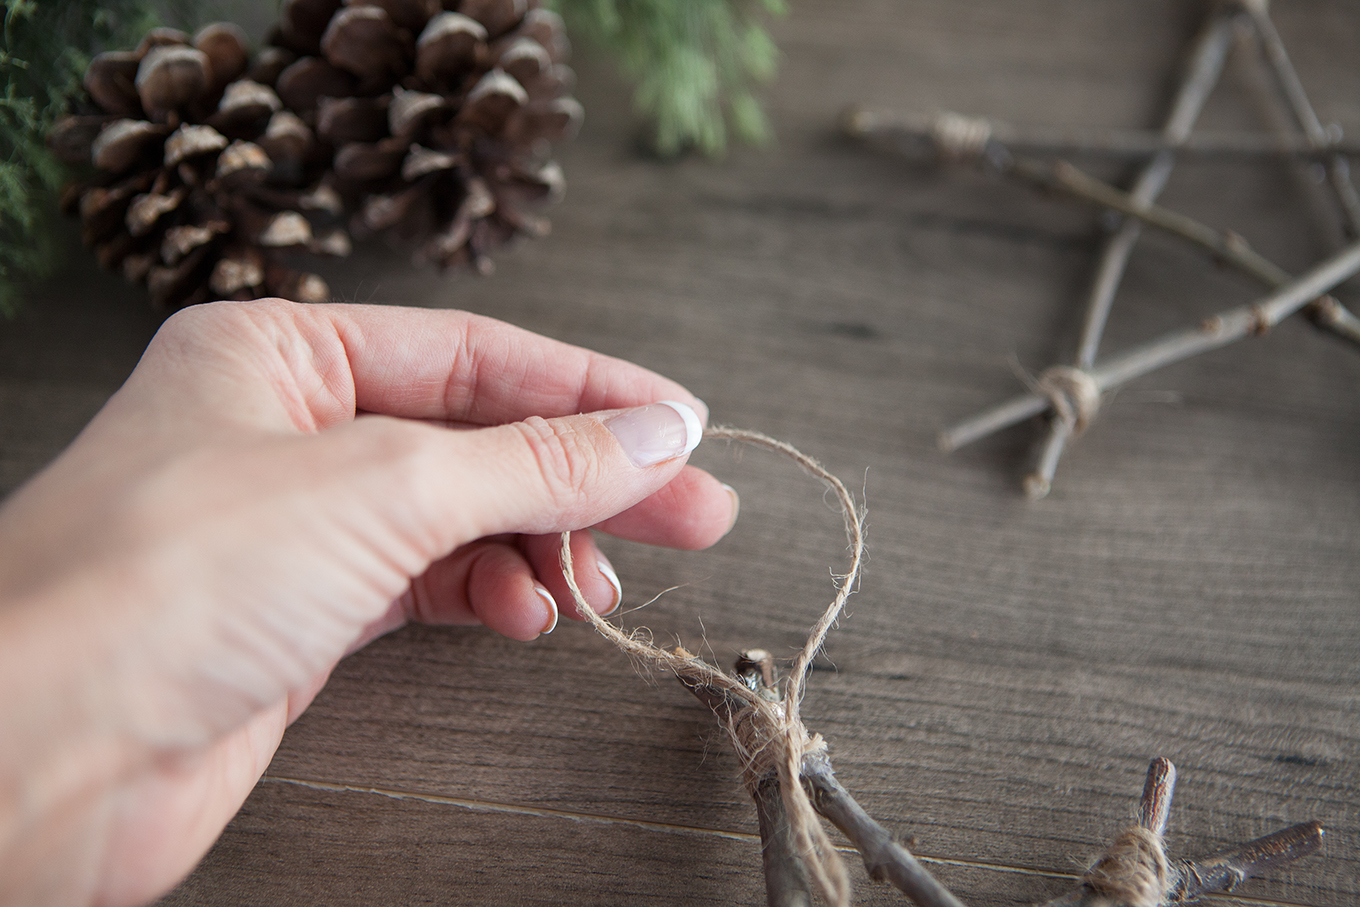
Take another small length of twine, form a loop and hot glue the two ends to the top point of the star at the back. This will be for hanging the ornament on the tree. Trim any excess.
Bring a touch of nature indoors this year as you decorate your tree – learn how to make rustic twig Christmas ornaments! They're simple, insanely inexpensive and look beautiful!
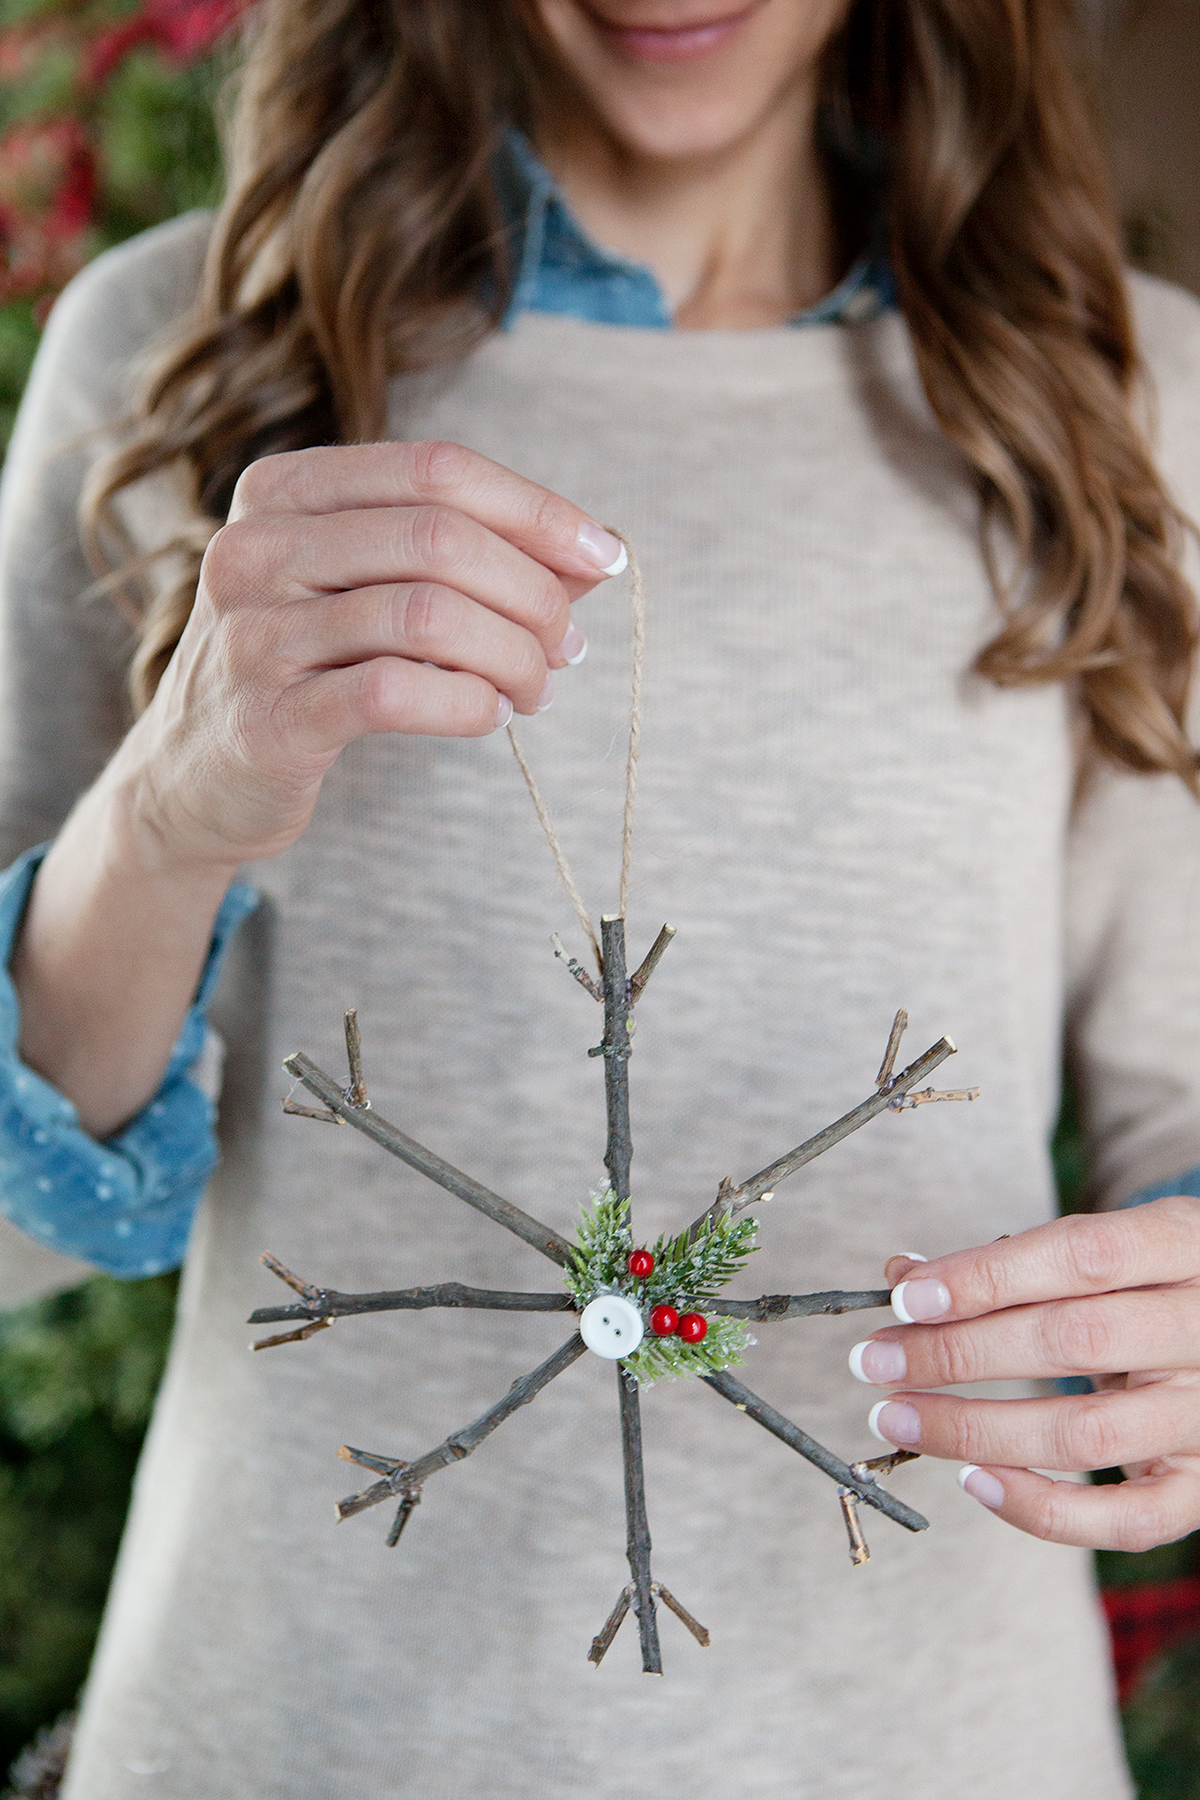
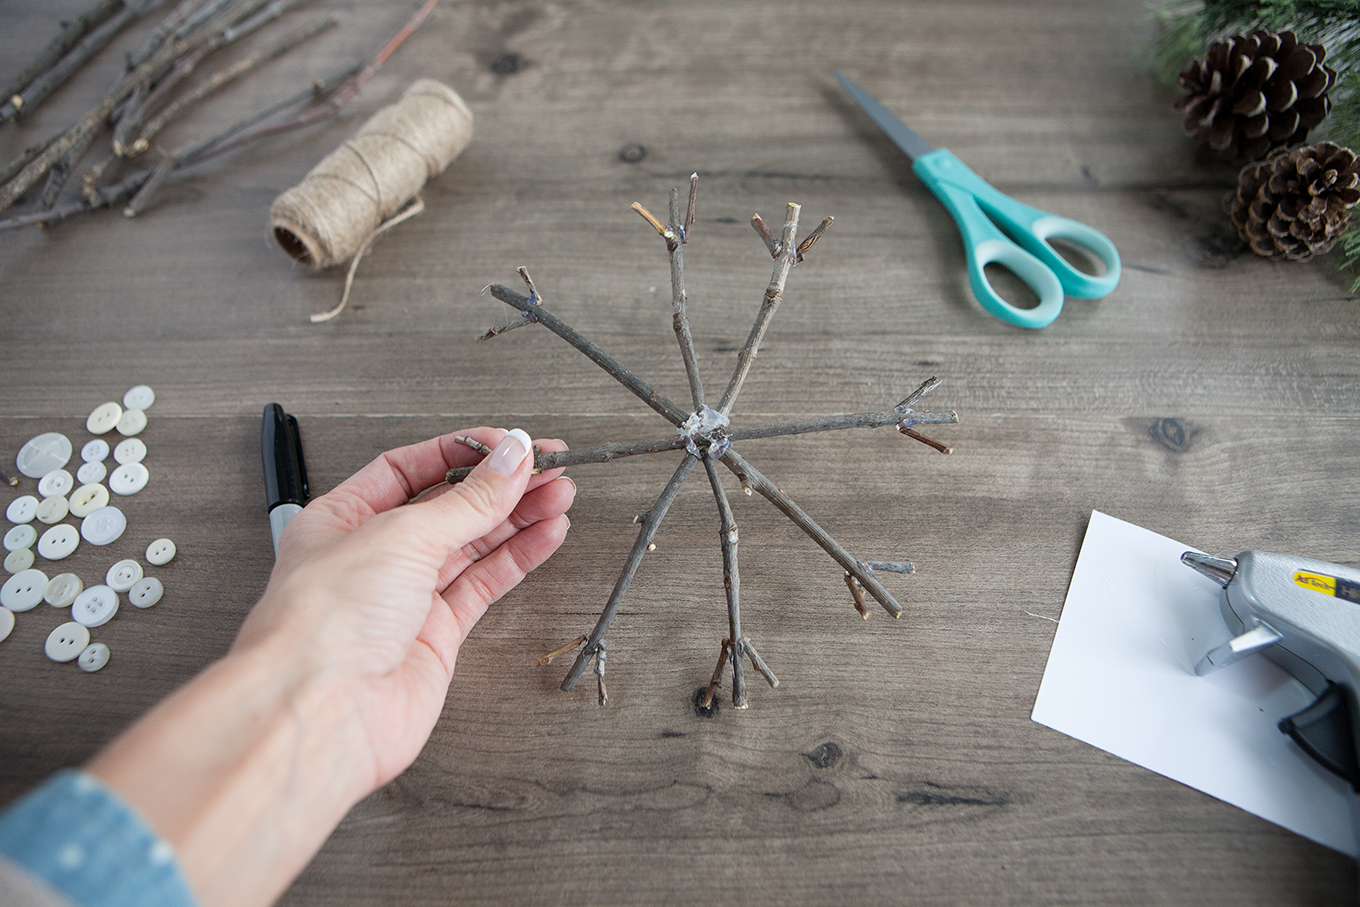
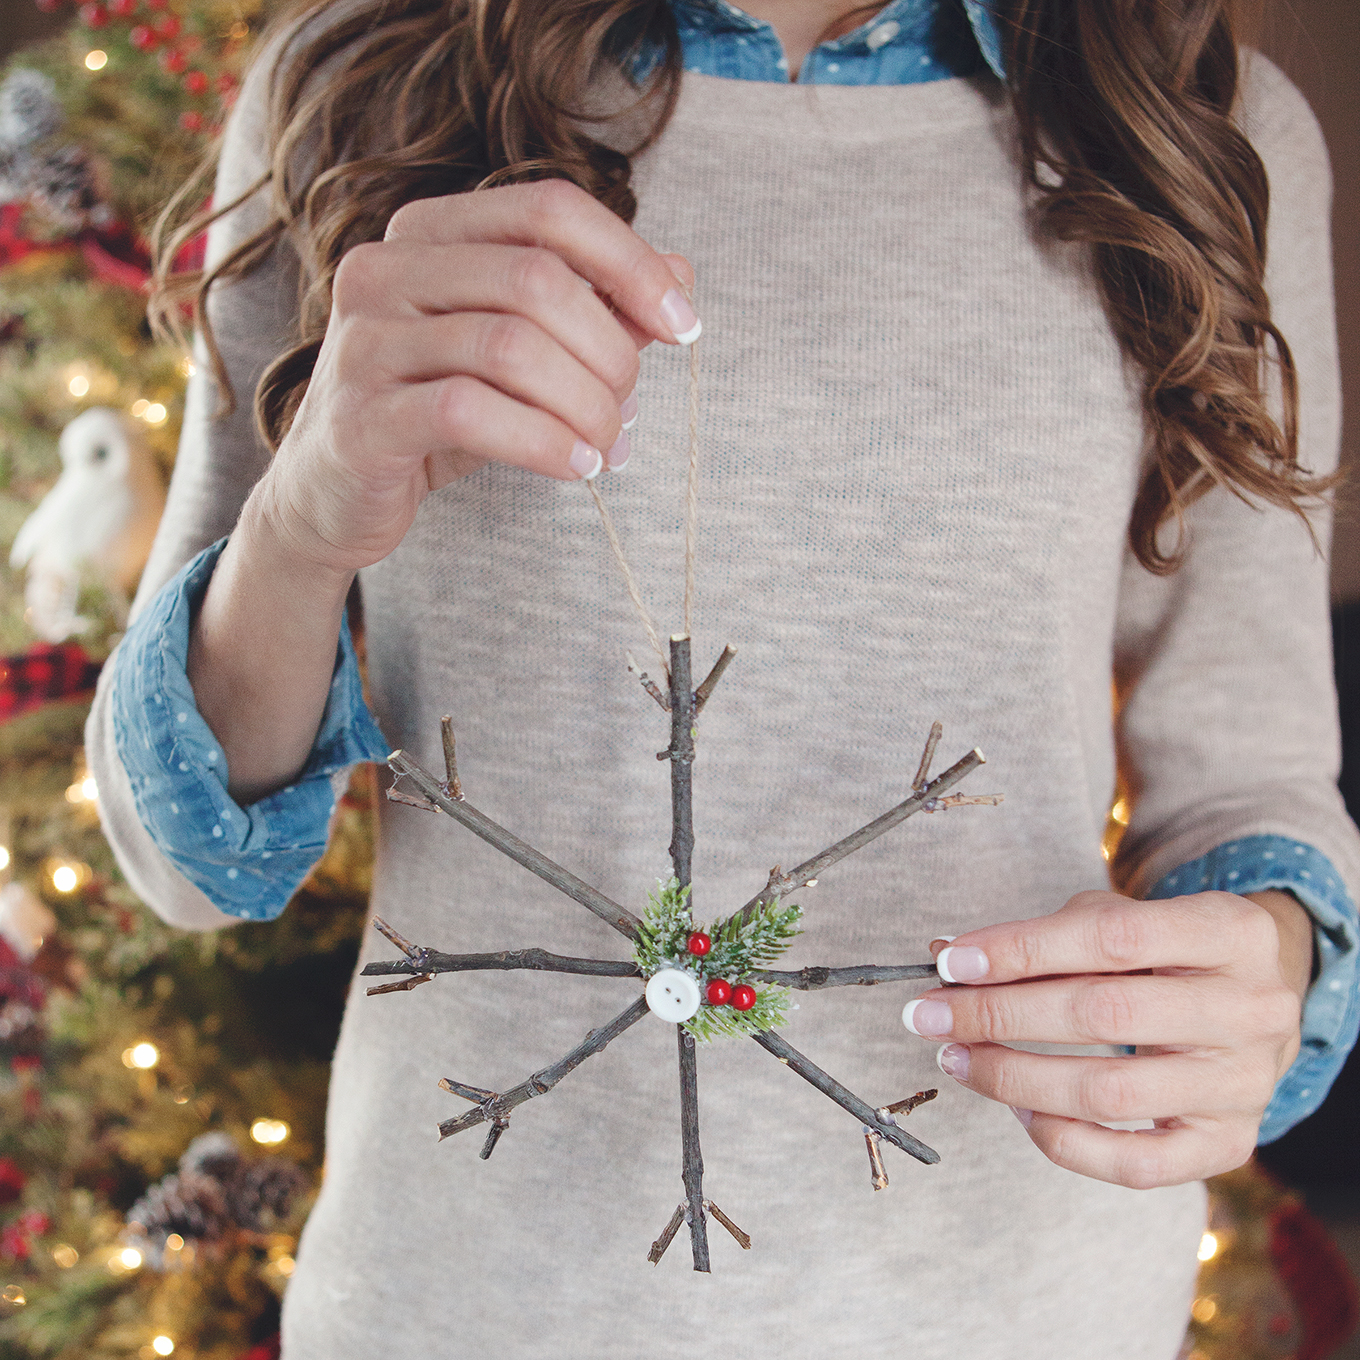
To make the Snowflake ornament begin with 1 long twig and 6 shorter twigs of equal length. Lay the long twig up and down. Arrange smaller twigs around longer one to form snowflake. Begin attaching smaller twigs to large one in the center.
Bring a touch of nature indoors this year as you decorate your tree – learn how to make rustic twig Christmas ornaments! They're simple, insanely inexpensive and look beautiful!
Once all the twigs have been glued to the center of the longest twig cut 16 tiny pieces to add embellishments to the end of each point on the snowflake. Attach these with hot glue.
Bring a touch of nature indoors this year as you decorate your tree – learn how to make rustic twig Christmas ornaments! They're simple, insanely inexpensive and look beautiful!
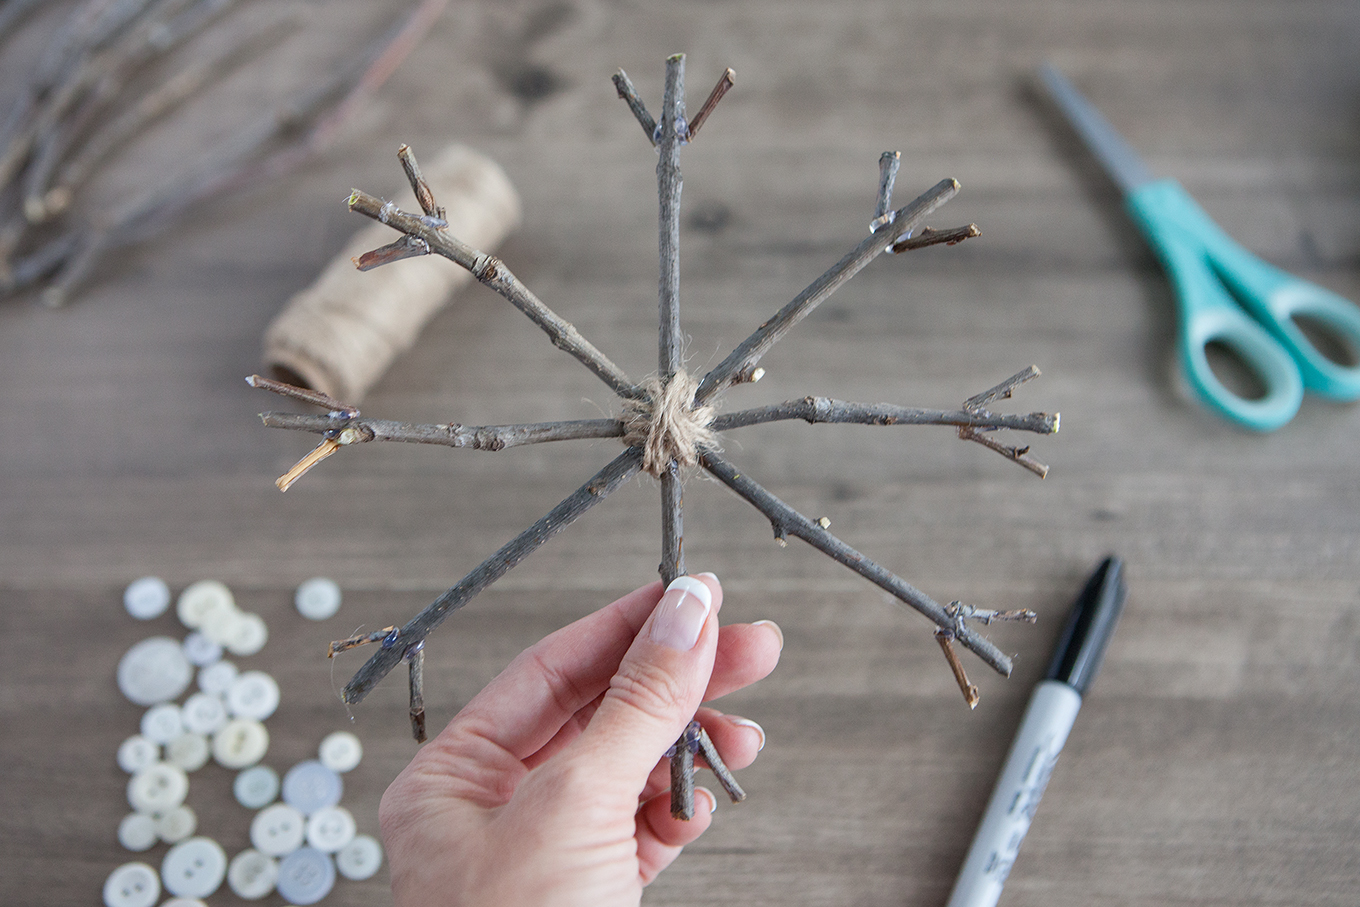
Wrap twine around the center of the snowflake to reinforce. Next decorate the center of the snowflake using sprigs of pine and berries and buttons.
Cut a short length of twine, form a loop and glue to the back of the snowflake at the top for hanging the ornament.
Bring a touch of nature indoors this year as you decorate your tree – learn how to make rustic twig Christmas ornaments! They're simple, inexpensive and look beautiful!
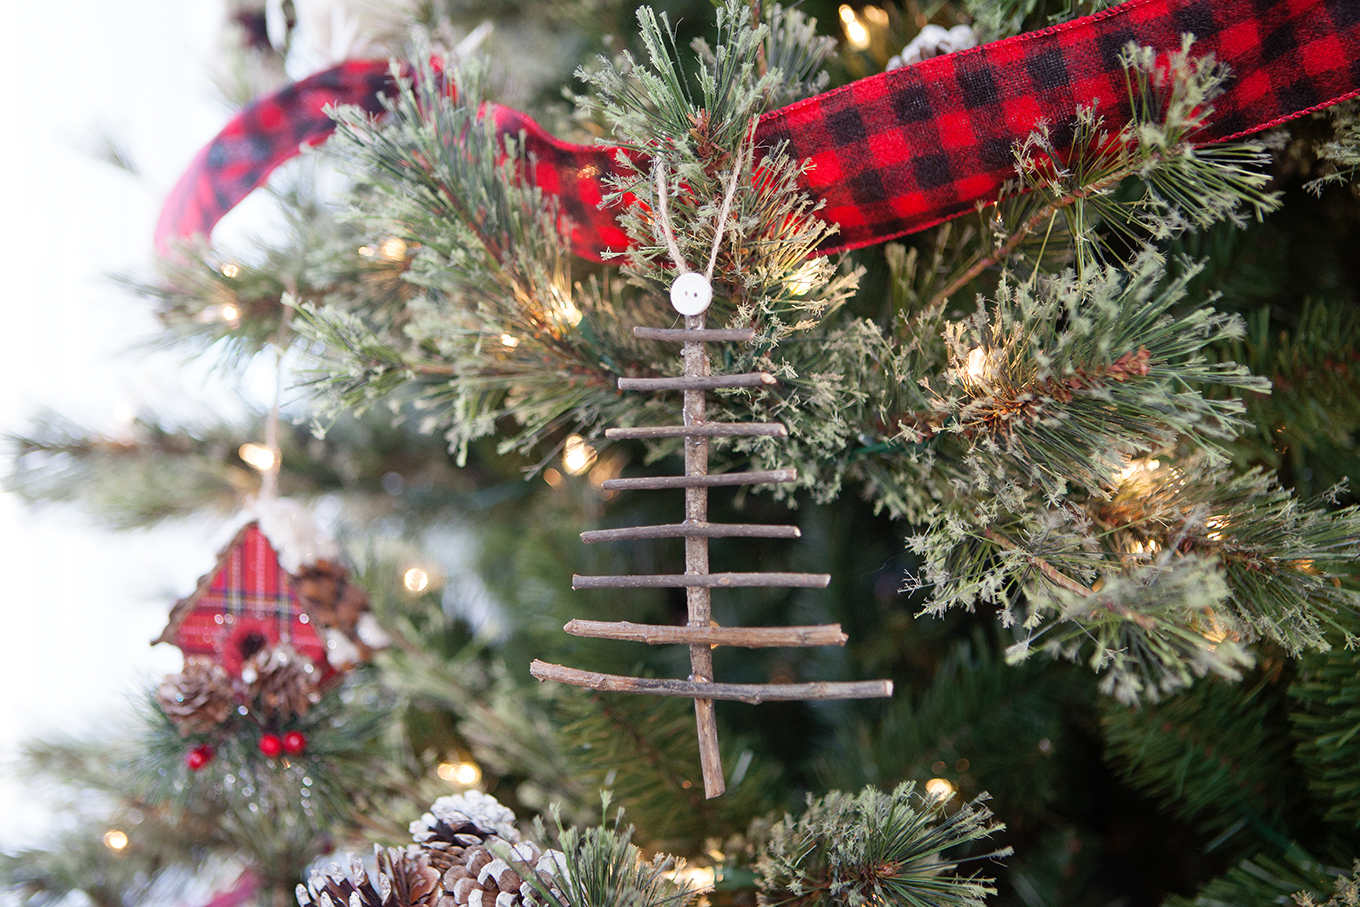
To make the tree ornament start with one longer twig. You can make these as large or as small as you want – I didn’t do any exact measuring here.
Next you’ll want to trim some twigs in graduating lengths. I used a sharpie to mark the length of these. You’ll want a smaller twig for the top of the tree and each twig will get longer as you move to the bottom of the tree. 8-10 twigs should be enough to form the tree.
Bring a touch of nature indoors this year as you decorate your tree – learn how to make rustic twig Christmas ornaments! They're simple, inexpensive and look beautiful!
Once you have all your twigs trimmed, attach them to the longer twig with hot glue. Add a button to the top of the tree for a star. Cut a short length of twine, form a loop and glue to the back of the tree at the top for hanging.
That’s all there is to it. These ornaments really are very simple to make. They’re great to get the kids involved with too! Head out on a short nature walk to collect stick and then make these ornaments together. You can help younger ones with the hot glue or let older children work independently using a low temperature glue gun.
If you need more instruction follow the short video below that will show you how each ornament was put together.

Fish Bowl Snowman craft for Christmas. ADORABLE! Use 3 different sized fish bowls

Here is the newest addition to our holiday decor: a Fish Bowl Snowman craft for Christmas! Isn’t it ADORABLE?! I set up a tiny Christmas scene in each one. I got everything from the craft store including the bowls! I can’t wait to show you how I made it:)

For this craft, you will need:
  • 3 different sized fish bowls that stack. I got these at Michael’s, but I’ve seen smaller versions at the dollar store!
  • Snow village pieces. Even though it’s not even Halloween yet, every craft store has allllll of their Christmas supplies out right now, including everything you’d need to create a little snow village. Or, you can always pick them out online (like these).
  • 1 bag of fake snow. Have no fear, any craft store will have this too. One bag goes a long way!
  • 2 sheets of black craft foam
  • scissors
  • Christmas ribbon for around the snowman’s top hat
  • Glue gun
Did you see this video on our Facebook fan page? Watch how fun it is to make a fish bowl snowman:
 Directions:
  1. Put a little fake snow at the bottom of each bowl.
  2. Arrange your various snow village pieces to make a special scene! I found a small house at Michaels, so I placed a flameless candle inside of it. I absolutely LOVE the warmth it gives to our fish bowl snowman. Plus, it’s so gorgeous at night. Well, I might keep it on during the day too:) I can’t get enough!
  3. To make the snowman’s top hat, you will need to trace a circle in the black craft foam that is slightly larger than the opening of your smallest fish bowl on top. I used a round Tupperware lid as a guide! Use a bowl or anything around your house to do this. Next, determine how tall the hat needs to be on top of the circle base you cut. Using the black craft foam, cut a rectangle that rolls into a cylinder. Hot glue the edges of the rectangle together to make a cylinder. Next, cut a small circle out and glue it to the 
  4. top of the hat. Finally, embellish the top hat with some Christmas ribbon!

Isn’t that fun? It looks so pretty in person and really adds charm to any indoor holiday decor.

Total Pageviews

Popular Posts